Otherwise known as a fold-down bed, wall bed, or pull-down bed, a Murphy bed is the convenient solution to designing a cozy bedroom despite having a small space to work with. For thrifty-shoppers looking to own this usually-expensive cross between a bed and a cabinet, a DIY Murphy bed should be perfect for you.
RELATED: 17 Easy To Build DIY Platform Beds To Transform Your Home
DIY Murphy Bed for a Bigger and Better-Designed Bedroom
DIY Murphy Bed Materials:
- Mattress support
- Frame sides (made up of 2 pcs. of 3/4 in. x 1-1/2 in. x 80 in. solid wood board)
- Frame struts (made up of 10 pcs. of 3/4 in. x 1-1/2 in. x 60-1/2 in. solid wood board)
- Headboard (made up of 1 pc. of 3/4 in. x 15-7/8in. x 64-3/8 in. plywood)
- Headrail (made up of 1 pc. of 3/4 in. x 15-7/8 in. x 64-3/8 in. plywood)
- Header rails (made up of 2 pcs. of 3/4 in. x 2-3/4 in. x 64-3/8 in. plywood)
- Face panel (made up of 3/4 in. x 32 in. x 81-1/2 in. plywood)
- Footrail (made up of 1 pc. of 3/4 in. x 3 in. x 62 in. plywood)
- Leg support rail (made up of 1 pc. of 3/4 in. x 3/4 in. x 60-1/4 in. plywood)
- Verticals (made up of 2 pcs. of 3/4 in. x 15-7/8 in. x 87-1/8 in. plywood)
- Side rails (made up of 2 pcs. of 3/4 in. x 5-7/8 in. x 81-1/2 in. plywood)
- Mounting cleats (made up of 2 pcs. of 3/4 in. x 1-1/2 in. x 14 3/8 in. solid wood board)
DIY Murphy Bed Tools:
- Jigsaw
- Drill
- Stud fined
- Wood glue
- Table or circular saw
- Screwdriver
- Clamps
- Paint
- Nails
- Safety goggles
- Murphy bed kit
Step 1: Prepare the Materials
Since these materials require accurate cuts, you can ask the help of your local hardware to do the measuring and cutting for you. Solid wood board is best for the frame to make it sturdy.
Step 2: Make Your Struts
Provide enough space for bed extension before building the struts. Measure the size of the bed and orientation. Divide the 10 strut pieces for the frame into five sets of two.
Using wood glue, make your struts by taking two strut pieces and gluing them into an L-shape. Secure them with 1-1/2″ screws after drilling pilot holes 8″ apart throughout the length of the struts.
Step 3: Assemble Subframe
After making the struts, create the subframes by placing your struts 20″ from one another perpendicular to the frame’s sides. Again, finish this step by drilling pilot holes for your 2″ screws.
Step 4: Round the Side Rail’s Corners
Using a jigsaw, round every side rail’s corner to a 2-7/8″ radius. You can have it pre-drilled at the hardware as well. Rounded corners should face the bed’s foot.
Step 5: Create the Foot and Head Rails
Place the side rails next to the sub-frame. Ensure that the rounded ends are at the foot and the leg rails are mounted on the outside. Use 1-1/4″ drill to make 5 pilot holes on the inner side of the subframe.
Ensure even spacing before attaching the foot and head rails with the 1-1/4″ screws.
Step 6: Attach Side Rails
Start by positioning the side rails next to the subframe. Make sure to keep the rounded ends at the foot and the leg hardware installed outside. With a 1-1/4″ bit, begin drilling pilot holes on the subframe’s inside on every strut’s side before connecting the subframe and the rails with 1-1/4″ screws.
Using 2″ screws, start drilling pilot holes through the side rails from the outside. Do this all the way up to the foot and head rail.
RELATED: 26 Cool DIY Projects For Teens Bedroom
Step 7: Position Panels
With their long sides together, put both face panels in a downward-facing position before aligning your bed frame above them. Make sure that on each of the side rails’ long sides, your panels extend by over 1/4″.
Make sure to keep the panels flush with that foot rail you built, but that you have the option to extend them beyond the rail.
Step 8: Attach Panels
With the help of the trace you made, secure the struts by applying glue to the face panels before repositioning your subframe on it. Check that the subframe is flush at the bed’s foot and centered on its sides.
With 1 -1/4″ screws, align the face panels and the subframes. Start by inserting screws on the last strut’s corners located on the bed’s foot.
Insert two more screws in the strut’s center at the foot rail before screwing the corners together at the bed’s head. Finally, add more screws in increments of 6″ to the remaining struts to attach them securely to the face panels.
Step 9: Assemble the Header
Flush your mounting cleats with the shorter ends of the headboard by drilling pilot holes through the headboard and using 2″ screws to attach them.
Ensure that the header is facing down before screwing a header rail at the headboard’s rear end. Allow 1/2″ of the header rail to extend below your headboard.
For the headboard, the remaining header rails should be aligned with the assembly’s front edge. Make sure to leave a 1/2″ extension underneath before securing them. Because this is the visible side, make sure to use finishing nails and glue.
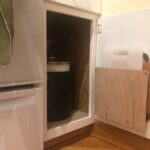
Step 10: Assemble Your DIY Murphy Bed’s Cabinet
Your verticals will serve as the sides of the cabinet. The header will go to the top.
With a drill and 2″ screws, attach the header’s short side to the verticals before cutting a notch to give your base molding clearance using a jigsaw. This ensures that the cabinet is securely flushed against the wall.
To finish the look, iron a veneer tape on all the plywood’s visible corners.
Step 11: Mount the Cabinet
Locate your wall studs. You’ll attach your header’s back side to them to install the cabinet on the wall.
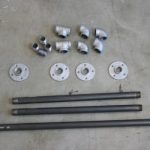
Step 12: Attach Your Hardware
Check the Murphy bed hardware kit for the hydraulic mechanism and install it. Keep in mind that your hydraulics kit should fit both your bed and the cabinet. Make sure you assemble it properly as well.
Stain or paint the wood before adding leg support according to the instructions in your Murphy bed hardware kit.
Step 13: Add the Handles
Install the handles on the outside panels. Make sure to put it on a level that you’re comfortable with.
Step 14: Install Support Panels for the Mattress
Finally, to cover the struts, you have to install the mattress support panels with 1-1/4″ screws to the inner side of the bed. With similar-sized screws, attach elastic bands into the mattress supports and through the struts.
Watch this video below as DIY Pete shows you how to build your DIY Murphy Bed from scratch:
A DIY Murphy bed is a great project for those looking to save space in an otherwise small bedroom. It might be a bit challenging to make, but it’s a fun project for any DIYer to make.
Did you face challenges while making your own DIY Murphy bed? Share them with us on the comments section below!
UP NEXT:
- DIY Bedroom Projects for Women Who Love Shabby Chic Decor
- DIY Headboard Ideas to Build for Your Bed
- 17 Creative DIY Nightstands | Bedroom Decorating Ideas
Calling all crafting DIYhards, DIY Projects needs YOU! Click here if you want to contribute for us.
Don’t forget to stay connected with us on Facebook, Twitter, and Instagram!
The post Fabricate A DIY Murphy Bed To Make Your Small Bedroom Look Big appeared first on DIY Projects Craft Ideas & How To’s for Home Decor with Videos.
Related posts:
 Rain Chains: A Fun & Effective Alternative To Gutters
 Save space by building this simple cutting board rack inside any door
 DIY Pallet Adirondack Chair You Can Do For Your Backyard
 DIY Acoustic Panels For Better Sound Absorption For Your Entertainment Room
 400+ Best DIY Christmas Projects You Should Make This Year
 The BEST Baked Sweet Potato Fries!
 31 Super Cool Reclaimed Wood Craft Ideas And DIY Projects
 63 Things To Never Throw Away For DIY Junkies [2nd Edition]
 How To Build A DIY Cat Tree For Your Feline Friend
 21 Fall Door Decorations | DIY Wreaths, Door Hangers, And More
 Japchae (Korean Noodle Stir-Fry)
 5 Easy And Creative 4×4 Wood Crafts To Decorate Your Home
 Exfoliating Foot Scrub with Essential Oils
 How To Make A Bombproof Pullup Bar | DIY Fitness
 Mom Finds A Genius Hack To Get Giant 9ft Bed For £440 So All Of Her Family Can Fit On It