
Welcome to PopSci’s at-home science projects series. On weekdays at noon, we’ll be posting new projects that use ingredients you can buy at the grocery store. Show us how it went by tagging your project on social media using #popsciprojects.
Any chef would agree that cooking is basically applied science and, unless you are an actual scientist working from home, your kitchen is the closest thing you’ve got to a lab. Following a recipe is essentially the same as running an experiment, and the best part is that you get to eat the delicious result. This project is no exception.
Making rock candy is easy—it only requires sugar, water, and patience. But if you don’t get your proportions right, you’ll be stuck waiting for crystals to form until the end of time. And that’s just sad.
Stats
Time: 30-40 minutes of prep, then up to two weeks of waiting
Difficulty: easy
What you’ll need
- 2 ½ cups of sugar
- 1 cup of water
- A pair of chopsticks (or any thin wooden stick)
- A spoon
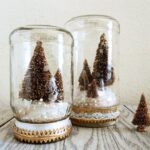
- 2 (12-ounce) mason jars (or any heat-proof glass container with a similarly wide opening)
- Clothespins
- Paper towels
- (Optional) Food coloring of your choice
- (Optional) Food flavoring of your choice
Instructions
1. Bring the water to a boil. Needless to say, this step should be performed by an adult to avoid any burns. Once the first bubbles start to appear, turn the heat to low.
2. Pour the sugar in to create a supersaturated solution. Do it slowly and keep stirring until all the crystals have dissolved. Eventually, you’ll feel like you’re inhaling some of the sugar in the steam—keep going. They don’t call it supersaturated for nothing.
- <b>Note:</b> The amounts of water and sugar in this formula will be good for two rock candy sticks. If you want to make more, increase the quantities, making sure to maintain the same 2.5-to-1 ratio of sugar and water. This, as you’ll see later, is crucial.
3. Let your solution cool down to room temperature. You can leave it in the pot or pour it directly into the mason jars. Moving it to the jars will accelerate the cooling process.
4. (Optional) Add color and flavoring. If you want to give your rock candy some color, put a couple drops of food coloring into the solution and stir. How much you use will depend on how vibrant you want the color to be. This is also the time to add flavorings. Again, how much you use will depend on how intense you want the flavor to be.
- <b>Note:</b> If you want each piece of candy to be a different color or flavor, pour the solution into your mason jars and add the attributes of your choice to each one.

5. Wet your sticks. Separate your chopsticks and put them in a glass of water. How deep you’ll need to submerge them will depend on the size of your mason jars and the amount of solution you made. For 12-ounce jars, dunk your chopsticks up to a third of their length. Then, take them back out.
6. Dip the wet ends of your chopsticks in sugar. Pour some sugar on a plate and roll those sticks around in it. Make sure they pick up as many crystals as possible.

7. Let the chopsticks dry for a couple minutes. If you can, place them on top of something so the sugar-covered end stays in the air.
8. Prep your mason jars. If you haven’t already, pour any food coloring and flavoring into the mason jars and fill them with the sugar solution. Make sure each jar has enough to fully submerge the sugar-coated ends of your chopsticks. You won’t need the lid, but if it helps, twist the band shut to make the opening smaller.
9. Put one chopstick in each mason jar. The sugar-covered end should be totally submerged. Hold the clean end with your fingers and make sure the stick doesn’t touch the bottom or the walls of the jar. If it does, crystals will grow between the wood and the glass and good luck trying to get your candy out later. Secure it in place with a clothespin. Repeat this step for the second jar.
- <b>Note:</b> This is why the size of the jar’s opening matters. If it’s too wide, the clothespin will fall into the solution and the chopstick will rest against one of the sides of the jar. You definitely don’t want this. If you can’t find clothespins big enough, you can use two. We even tried tying a piece of yarn to the chopstick and keeping it in place by pulling it tight and securing both ends with the band. Reaching a balance is tricky though, since the chopstick will tend to lean to one side of the yarn, but it’ll do the trick in a pinch.
10. Cover your jars with paper towels. This is just to make sure nothing funky falls into your jar and gets fossilized in the sugar. Fold the paper towel in two and, using scissors, make a small cut in the center to put the chopstick through.
11. Wait. Growing rock candy is a slow process. You’ll start to see some crystals by day two, but they will reach their peak growth after two weeks.
12. Get your candy. Whenever you’re satisfied with the size of your rock candy, feel free to release it. Using a spoon, break the sugar layer on top and move the chopstick around to get it out. If for some reason there are crystals attaching the stick to the jar, an adult can use a knife to chisel it out carefully.
How it works
Water’s ability to dissolve sugar changes with temperature. That’s why if you pour two packets of sugar into a cup of hot tea, the crystals dissolve almost immediately. If you put it in a cup of iced tea, though, some crystals will sink to the bottom.
At room temperature, water is only capable of dissolving around 67 percent of the sugar you pour into it—that specific saturation at that particular temperature is thermodynamic equilibrium.
“When the concentration is less than 67 percent, any crystals you add to the solution will dissolve trying to reach thermodynamic equilibrium,” explains Richard W. Hartel, a food engineering professor in the food science department at the University of Wisconsin-Madison.
Room-temperature water with a sugar concentration any higher than that makes a supersaturated solution. We need that type of high concentration to grow our crystals. But in order for so little water to dissolve such a large amount of sugar (2.5 cups!) we need to boil the water first.
When the solution cools to room temperature, its sugar concentration will remain the same as when it was boiling—approximately 75 percent. At that point, sugar molecules in the solution will try to reach equilibrium by lowering the concentration to 67 percent. They do this by going back to their original state.
“In liquid form, the sugar molecules have a lot of energy as they bounce around. But when constrained in a crystal lattice, their energy is low,” says Hartel.
The sugar on your chopsticks makes it easier for crystals to grow around them, but (as you’ll see) they’ll also form on the walls of the mason jar and even on the very surface of the solution.
After about two weeks, when the sugar concentration has reached 67 percent, crystals will stop growing and your rock candy will be as big as it can be. Chisel those crystals like you’re unearthing an ancient treasure, and enjoy.
Related posts:
 60 Gifts In A Jar That Are Oh So Cute And Easy To DIY
 23 DIY Crafts With Mini Mason Jars
 Christmas Candy Recipes with 6 Ingredients or Less
 A Local’s Tips on Where to Eat, Drink, and Stay in Paris
 Is Mineral Water Worth the Extra Cost? Find out Here
 A Bite-Size Stop in Little Rock, Arkansas
 Watching How Cookie Cutters Are Made Is Oddly Satisfying
 A Bite-Size Stop in Seoul, South Korea
 How To Make A DIY Mason Jar Chandelier
 Water Intoxication: How Much Water Is Too Much?
 How to Spend a Weekend in Westchester County
 A Bite-Sized Stop in Vancouver, BC
 A Bite-Size Stop in Memphis, Tennessee
 How to Make Your Own Halloween Candy
 A Paleo Meal Planning Guide to Keep You on Track All Week
 11 Best Sugar Substitutes (the Healthiest Natural Sweeteners)