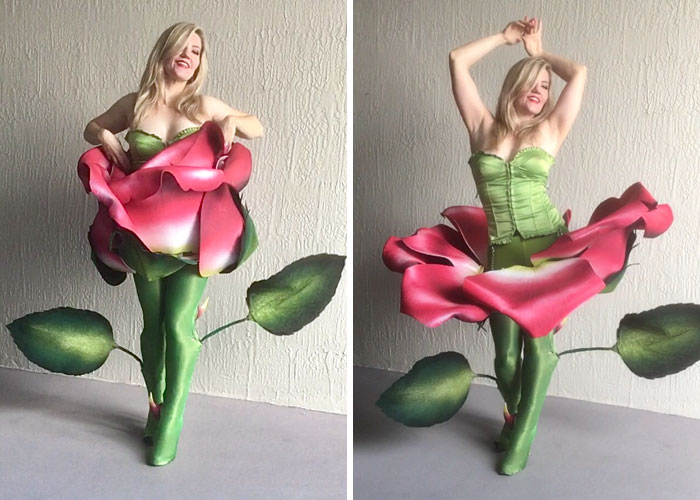
While Halloween is certainly over, some costumes leave such a strong impression that it’s worth talking about them days, even weeks, after the event. One of such costumes is definitely this ‘blooming’ rose made by Genevra Collier. Not only is it made of foam and toilet seats, she crafted the whole thing in just 26 days! Talk about dedication!
Collier not only showed the final result, an impressive animated flower costume, but also was kind enough to give as a step-by-step guide on how she made it. Through trials and errors and endless hours trying to meet the deadline – a Hallowee party – Genevra pulled all the string together just hours before the event. And hell, all the effort was definitely worth it. Check out the process as well as the result and watch your mouth open in awe!
This impressive moving costume was created in 26 days!

She started off with a sketch

“In addition to looking like a big ol’ flower, I wanted the costume to bloom.
To animate the bloom, I used slow-close toilet seat hinges. I was inspired by the bathrooms at my office LOL. Making it happen was my toughest challenge to date. I had 26 days to get it done, no clue if it would work, and no backup plan. A complete Hail Mary (as usual).”

“Step One: acquire toilet seat. I tested a bunch of slow-close ones at different stores, and found a Bemis that seemed to have the smoothest most consistent motion. They’re $40 a piece, but the whole costume hinged on that movement (sorry).”

“Step Two: extract hinges. For this I bought a little circular saw and sliced the lid and seat in half. I thought maybe the whole thing would just fall apart once it was separated, but I wound up with two functional hinges! Surprise discovery: the hinges aren’t symmetrical. One is attached to the seat side and one to the lid, and the housing is slightly different.””

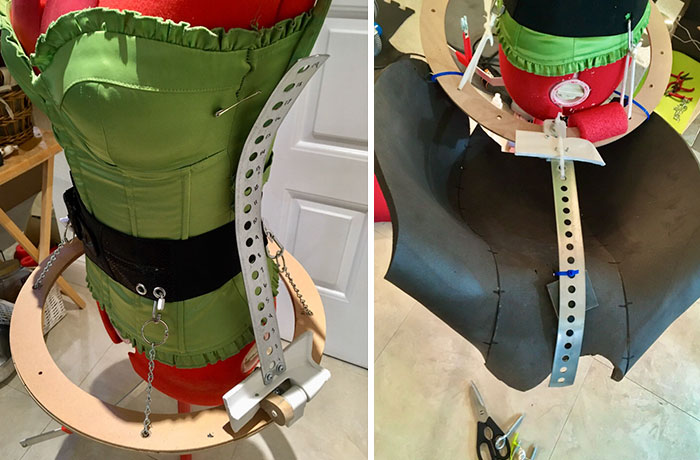
“I drilled the hinges and bolted them onto a ring of MDF that would serve as the foundation for the costume. All the elements of this project can be disassembled and rearranged, which allowed me to change things up a lot as I figured out the design, without starting over.”

“Once the hinges were cut apart, I had to stabilize them on the empty side to keep them from wiggling lose. After wrapping my brain around what needed to happen (ouch), I made a foam core mockup, then traced and cut it out of MDF and sanded it into shape. I screwed the MDF pieces onto the lid plastic from the back.”
“To avoid the headache of a different stabilization solution for the seat-side hinge (and reduce variables for easier problem solving later), I bought a second toilet seat and cut it up so I was working with two lid-side hinges. Then cut away most of the lid plastic, so I could add my own hinge arms!
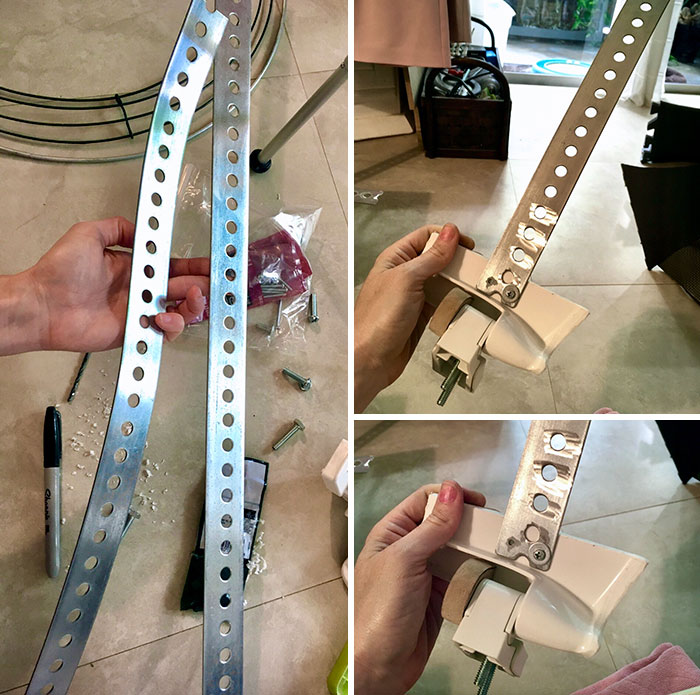
The hinge arms needed to have some weight for the movement to work. This perforated steel was one of the best choices I made in the whole project. It’s juuuust light enough that I could bend and shape it with tools, and the evenly spaced holes were a handy ruler as well as pre-made, symmetrical anchor points for everything I needed to attach as I figured things out.”
“The hinge arms were shorter levers than the toilet lids, so I needed to compensate for that, and also speed up the movement a little. Good thing I bought that circular saw so I could slice up a bar of 2” x 3/8” steel to make weights.”
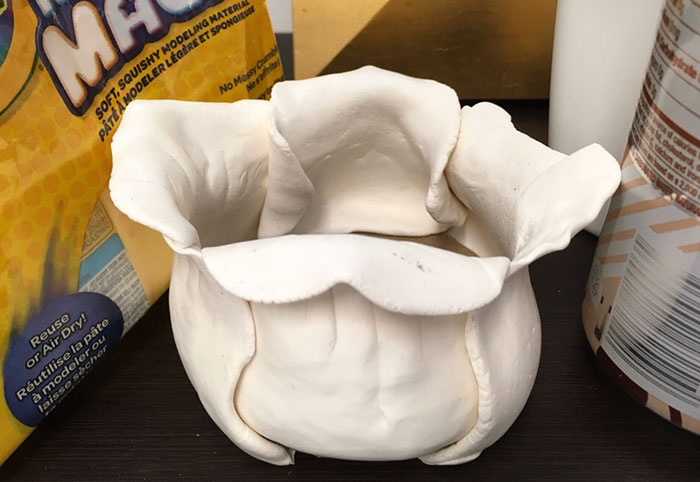
“With the mechanism underway, I started thinking about the petals. But HOW to PLAN them was its own challenge. I didn’t want to cut up my real petal material without a roadmap, but how could I test the shape and movement without some kind of model? Did it need to be full-scale? I made a wired paper mockup (sad), then a mini model with air dry clay (better). I was planning to use four hinges total, but the clay model helped me see that I wanted TWO hinged structural petals to hold the rest of the rose in place, for a more elegant release and easier re-setting. From there, I needed a pattern for the shape of those outer petals.”
“I’m still really new to patterning, but after messing with it a bit, I realized I needed to join together bowling pin-type shapes to get the right curves.
Meanwhile, I was also thinking about the finish//look. There’s a limited window of time to get stuff online, so I order everything I might possibly need and return what isn’t used. Like every color of green tights and every relevant shade of paint XD”

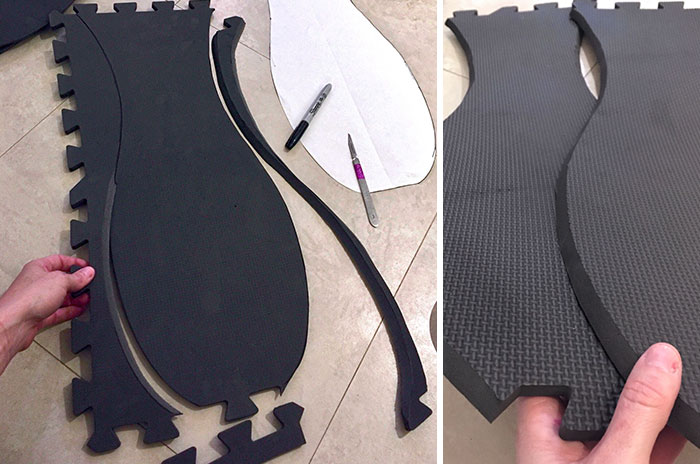
“To make the full-sized petals, I used floor mat foam. This is that puzzle piece stuff you can line your garage etc. with! It’s pretty inexpensive, esp if you get it at Harbor Freight.
I should say that I DRAFTED them this way.. unfortunately, the EVA foam sold at hardware stores is textured, so for the final petals I had to order from a cosplay supply website. It’s the same foam material, but smooth on both sides.”

“My first draft with foam petals was MASSIVE. LOL, ok the final thing is big too, but I definitely needed to trim everything down a bunch.”

“Once I had the petal shape worked out with puzzle piece foam, I cut the final pattern from fancy pants high quality foam. Glueing the pieces together gave me the basic shape, and I curled the tops of the petals around a bit of pvc using a heat gun.”
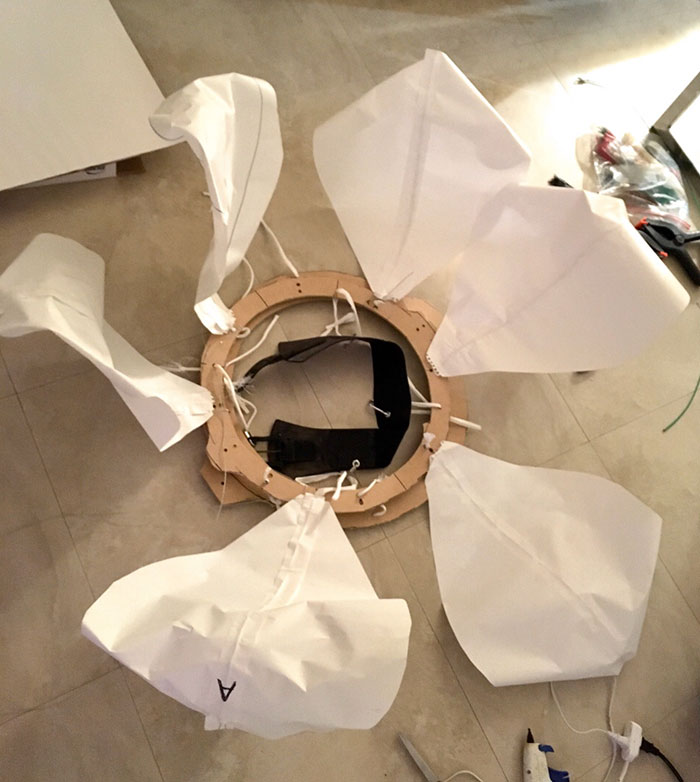
“Here’s how it came together once the mechanism was finally ironed out and the outer petals were ready! The inner petals were attached to the MDF ring in an overlapping order inside the outer ones.”


“For the leaves, I covered long wires with masking tape, then wrapped them in felt (the red was a test). At the leaf end, I divide the three wires and used one to form the central vein and two along the edges so the leaves could be shaped and crumpled for a natural look. TBH I really wasn’t feeling good about any of this until I added the paint job. Oh, shout out to Krylon glitter blast – that stuff is the MVP. Also, shout out to Andre for holding down the corners ;)”
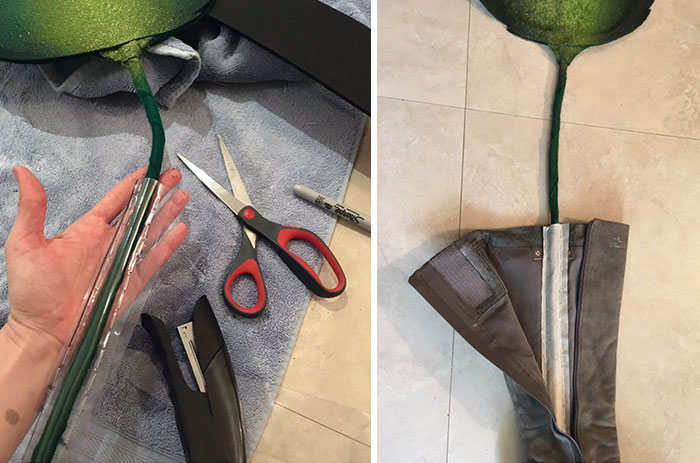

“To support the leaves, I wanted to insert the stems through a grommet in green tights and into a boot channel. I needed tall boots with a close fit, plus the right heel and toe shape, and Goodwill never freaking lets me down. I scored these knee-high suede GianinBini boots in one try on my lunch break for $10. They were so pretty I hated to mess them up, but whatcha gonna do. I made the stem channels with some leftover vinyl and a stapler, then I used super tough contact cement to instal them.”

“The thorns were supposed to be quick and easy but…no, lol.
I tried three different approaches to get the very specific shape and clean finish I wanted – this was the winner. This is craft foam, assembled (very carefully) with hot glue, edges sanded, and primed with plasti-dip”
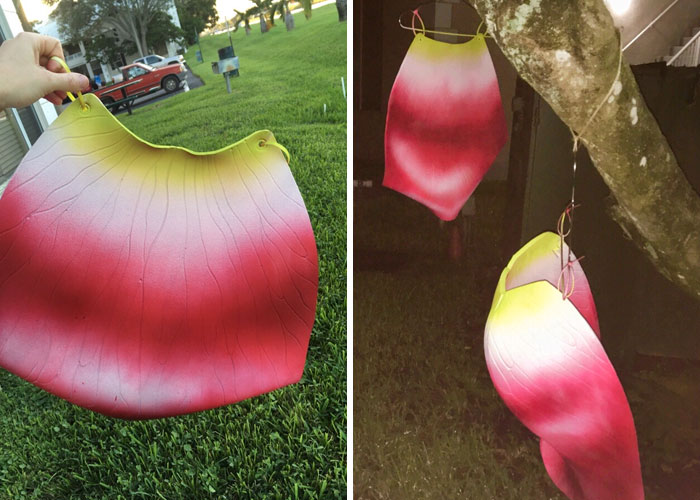
“Back to the flower part! EVA foam is so great.. I used a wood burning tool to give the petals some realistic texture…”

“Somehow I failed to realize how much finishing this thing was going to need. I had 1.5 days to go (minus 16hrs at the office) and every petal had to be textured on both sides (fourteen surfaces), primed on both sides (three coats each) and painted on both sides. Thank god this paint dries almost instantly, and I was able to do the whole thing with spray cans and skip the airbrush! I was up all night on the 31st and finished the painting at 6am the morning of my party. Then I had to reassemble all the petals on the armature, fix the heat-shaping that had relaxed out, and tweak the fit of everything so the motion worked smoothly again.”

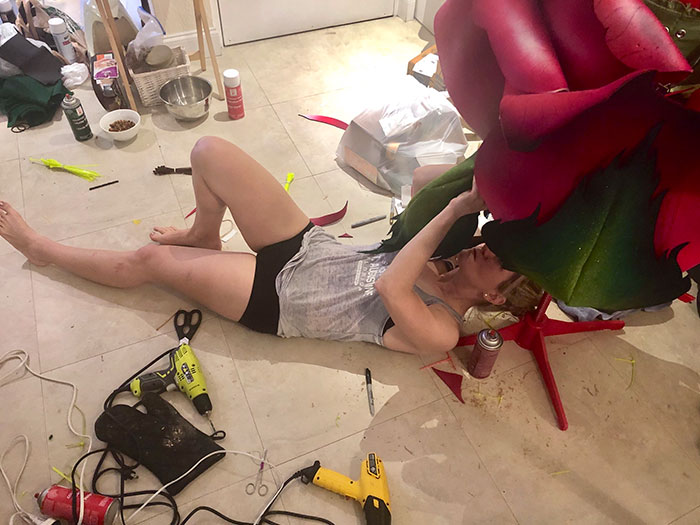
Last minute tune up. And when I say last minute, I mean the bloom didn’t work properly till an hour before I was supposed to leave the house…
And here’s the stunning result!
“The dewdrop is half a Christmas ornament”

“Honestly, I can’t believe it really happened. It took every minute of every day I could scrape together, and there were so many times when I had to keep ploughing ahead even tho I thought it seemed it was gonna fail or I couldn’t figure it out. But the only way to fail for sure is to quit.”

Genevra has previously created some stunning costumes like this “I Scream Sundae”

As well as the turtle costume for her friend

Related posts:
 How To Make A Minion Costume | DIY Costume Plans
 12 DIY Snow White Costume Ideas For Halloween
 50 Halloween Costumes You Probably Wish You Thought Of Yourself (New Pics)
 12 DIY Vampire Costume Ideas To Bite Into
 The Best Last-Minute Food Costumes for Halloween
 15 Fun & Easy Toilet Paper Roll Craft & Projects For Kids
 No, you don’t need to hoard toilet paper to prep for a pandemic
 Rain Chains: A Fun & Effective Alternative To Gutters
 DIY Pallet Adirondack Chair You Can Do For Your Backyard
 Ironically, the next frontier of waste-free living is coming for your bathroom
 Top 10 Travel Pillows Of 2019 To Help You Manage Your Travel Blues