
Just in time for Valentine’s Day, we’re revisiting one of our most popular Chow-To episodes, in which senior video producer, Guillermo Riveros, learns to make French macarons from Jayce Baudry, executive pastry chef at Daniel Boulud’s Épicerie Boulud. Follow along with his expert tips and you can turn out bakery-worthy macarons at home, a perfectly romantic sweet for a special someone—or for treating yourself.
If you’ve never eaten a macaron (not to be confused with a macaroon), they are the most delightful sandwich cookies: crisp yet chewy meringue shells, held together by a creamy filling, usually ganache. Traditional macarons also happen to be naturally gluten-free, as they’re made with almond flour. Keto, not so much—sugar is the main ingredient, along with eggs.
The French patisserie Ladurée is one of the most well-known names in macarons, and claims to be the place where they were invented (in 1862). In the U.S., they hit peak craze levels in 2010/2011, but they’re still fairly universally beloved.
Ladurée Paris Macarons, 12 for $41 on Goldbelly
If you’d rather buy than DIY, you don’t even have to go to Paris.
Buy Now
Most bakeries that offer macarons have fun with them: They arrange rows of colorful options with fanciful flavors, making their glass display cases look more like jewel boxes. And while there is definitely an art—and some technical skill—involved in making macarons, it’s really not as hard as you might think.
Chowhound’s White Chocolate Ganache Macarons recipe
Here are some of the key tips we learned, as well as the recipe from Jayce Baudry and Épicerie Boulud.
1. Weigh Your Ingredients
It may seem fussy, but it really is the best way to get consistent results, especially when baking—and it’s kind of fun! Plus, digital scales these days are super affordable. (That said, if you refuse to acquire another piece of kitchen equipment, check out our French Chocolate Macarons with Chocolate Ganache recipe, which uses standard cup and spoon measurements, but work in some of your newly acquired expert techniques from the video above.)
Ozeri Scale Pronto Digital Multifunction Kitchen Scale, $9.75 on Amazon
Measure in grams or ounces, within two decimal points for even greater accuracy.
2. Grind Your Almond Flour and Powdered Sugar
You might think you can skip this step, but it’s important to get all your dry ingredients as fine as possible, so the macaron shells have the proper smooth texture. If you want to be extra-sure your dry ingredients are free of even the tiniest lumps, after grinding them in the food processor, sift them through a fine mesh strainer into your bowl.
Hamilton Beach 12-Cup Stack and Snap Food Processor, $49.99 on Amazon
A kitchen workhorse with a large capacity.
3. Separate Your Eggs in Advance
Your egg whites will whip up more effectively if you separate them from the yolks two days in advance of baking; just store them in a bowl in the fridge until then. (You won’t need the yolks for this recipe, but don’t toss them out—use them for something like aioli or blender hollandaise. The Chowhound community has had some other good ideas for using extra egg yolks.)
4. Go with Gel Food Coloring
If you want to make brightly colored shells like the vibrant arrays you see in pastisserie windows, stick with thicker gel food coloring; too much liquid can make the batter too thin and compromise your cookies’ structure. Use more gel coloring than you think you need, because the bright hue will fade once you add the meringue, and fade again in the oven. You can also try powdered food coloring, though it may be harder to find.
AmeriColor Food Coloring Student Kit, 12 for $26.25 on Amazon
Every color of the rainbow, and then some.
5. Make a Template for Uniform Macarons
To help you pipe uniform macarons, use a small round cookie cutter (about 1 1/4 inches) and a black marker to trace circles (1 inch apart) on a piece of paper the same size as your baking sheets. Then place that template underneath the parchment onto which you pipe your macarons and use the circles as a guide. Slide the template out from underneath and use it again for the next batch.
Silicone Macaron Baking Mats, 2 for $12.45 on Amazon
You can also buy silicone mats with piping guides (and use them for lots of other things besides macarons).
6. Practice the Art of Macaronage
Macaronage is the technique for mixing the macaron batter, in which you use a bench scraper to lift the batter up from the bottom of the bowl and mix it until it’s smoother, shinier, and starts to relax and flow back down into the bowl. Usually, when you’re dealing with whipped egg whites, you want to treat them far more gently so as not to deflate them, but for macarons, that’s actually a good thing in moderation, and helps the shells achieve the proper smooth, even shape. (That said, you still don’t want to work all the air out of the mix.)
OXO Good Grips Stainless Steel Bench Scraper, $9.99 on Amazon
An underrated but very helpful pastry tool.
7. Bang Your Pan
To make sure the tops of the macaron shells are flat and even and the frilly foot will form as intended, give your pan a firm whack or two on the countertop after piping the shells—but be sure to hold the parchment paper down with your thumbs so you don’t lose any shells in the process!

Chowhound
8. Let Your Shells Dry Out
“Dry” is usually a dirty word when it comes to baked goods, but again, macarons flip the script. Giving your piped shells time to dry out a little is essential to getting that patisserie-perfect shape. Let the pans sit on the counter for about an hour before you bake (and as long as overnight). If you don’t, steam will erupt and crack the tops of your shells. Once they’ve formed a bit of a skin, the steam will escape from the sides instead, forming that classic fluted “foot” on your macarons. You can check for a skin by gently touching a shell; if nothing sticks to your finger, it’s time to bake. Because humidity can interfere with drying time, some people don’t make macarons on rainy days.

Chowhound’s Pistachio Macarons recipe
9. Don’t Be Afraid to Get Creative
When it comes to flavor combinations (and colors), let your imagination run wild. Ganache is the traditional filling, and it’s fantastic, but you can use pretty much anything you like, from lemon curd to Nutella to jam or jelly, to sandwich your shells together. And try infusing different flavors into the shells themselves, like lemon zest (paired with a lavender white chocolate ganache?). Just remember the cautionary note on not adding too much liquid to the batter; 2 teaspoons of vanilla or other extract is probably the maximum amount you want to add (and that’s probably way more than you’ll need anyway, since many flavorings are potent). Try orange flower water or rose water for a floral twist.
Kootek Frosting Tools Set with Piping Tips and Bags, 42 pieces for $10.99 on Amazon
A piping bag will help you make neat cookies, and fill them too.
And remember: Even if your macarons don’t come out parfait the first time, they’ll still be delicious! (But if you do run into problems and aren’t sure why, check out this macaron troubleshooting guide.)
Classic French Macaron Recipe
This recipe will make about 200 shells (so 100 macarons total)—but with a scale, it’s easy to cut the recipe in half or otherwise reduce the ingredient amounts to a more manageable size. Note: the ingredients list shows two different amounts of egg whites because they’re added at different points in the process.
Ingredients:
- 372 grams powdered sugar
- 372 grams almond flour
- 159 grams fresh egg whites
- 372 grams sugar
- 99 grams water
- 126 grams fresh egg whites
- Filling of your choice (ganache is traditional)
Instructions:
1. In a food processor, grind the almond flour and powdered sugar to a very fine powder.
2. In a stand mixer with the paddle attachment, mix the powder with 159 grams of egg whites until you have a paste. Scrape down the sides and bottom of the bowl to be sure the dry ingredients are fully incorporated
3. In a heavy-bottomed, deep saucepan, use a spatula to stir the sugar and water together over medium-high heat. Stir just until the sugar melts, but be sure not to stir again once the mixture boils or it may crystallize (if it does, start over again). Allow the sugar and water to boil until the mixture reaches 244 degrees Fahrenheit (or 118 degrees Celsius) on a digital candy thermometer. Remove from the heat and set aside.
4. In a stand mixer fitted with the whisk attachment, whip the 126 grams of egg whites until they become voluminous and hold soft peaks. Then, with the mixer still running, slowly pour the cooked sugar mixture into the bowl, sticking close to the side of the bowl rather than near the center, until it’s all incorporated. Continue to mix until the outside of the bowl is no longer hot, but just feels warm to the touch. When you lift up the whisk, the meringue should hold soft peaks.
5. With a spatula, fold half the meringue into the wet ingredients until incorporated. Scrape down the sides of the bowl, then fold in the other half of the meringue until incorporated and break out your bench scraper for macaronage. Check out the video for a demonstration of the technique. Your mixture should be shiny, smooth, and start to relax a bit in the bowl.
6. Use a piping bag fitted with a 10 millimeter tip to pipe circles of batter onto parchment paper-lined baking sheets (expert piping technique is also demonstrated in the video). Leave the sheets out on the counter for at least an hour to allow the shells time to dry. (This downtime is also a good time to make your ganache if that’s what you’re using to fill the shells, since it will need to be completely cool and thicken up before you pipe it!)
7. Preheat your oven to 350 degrees and arrange a rack in the middle. Bake one sheet of macarons at a time for 14 minutes each, rotating the pan halfway through each baking session. You’ll know the macarons are done when they don’t move about on the parchment when you give them a nudge.
8. Allow shells to cool completely before piping the filling of your choice onto half of the shells and sandwiching them together. Et voilà!

Chowhound’s Pomegranate Ganache Macarons recipe
Check out all of our Chow-To episodes, and stay tuned for more.
Related posts:

 Egg Fried Rice Recipe [Video]
 11 Best Sugar Substitutes (the Healthiest Natural Sweeteners)
 The Best New Cookbooks for Fall 2019
 The BEST Baked Sweet Potato Fries!
 36 Beautiful Smoothie Bowl Recipes To Nourish Your Mornings
 Your favorite way to cook eggs, according to your zodiac sign
 Brown Sugar vs. White Sugar + 5 Healthier Substitutes
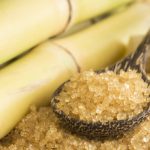 Cane Sugar: Is It Any Healthier than Common Sugar?
 The meal prep plan you need for easy gluten-free dinners all week
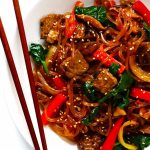 Japchae (Korean Noodle Stir-Fry)
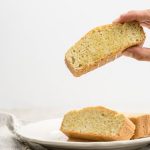 Keto Bread: A Low-Carb Bread Recipe
 A definitive ranking of the 9 healthiest veggie chips
 The Best Last-Minute Food Costumes for Halloween
 Amazon’s Best Cookbooks (& Other Food Books) of the Year…So Far