Having a mini garden is such a trendy thing now that everyone’s staying indoors. Many people are trying their hand at indoor gardening but are afraid to commit to big plants, especially those who are first-time plant moms.
RELATED: 15 Terrarium Plants You Can DIY With Your Kids This Weekend
Stuck in Quarantine? DIY Your Own Mini Garden!
What You Will Need:
- Small plants of your choice – It is advised that you choose plants that belong in the same species or have the environment requirement. For example, succulents can’t be in the same terrarium as ferns, because ferns need moisture and succulents need air and dryness.
- Clear glass container – Choose from an open or a closed one. For succulents and cacti, open containers are the most ideal. For ferns and plants that need humidity to thrive, closed containers are best.
- Rocks – You can gather small rocks from your garden. This is also a great activity for you and your kids as preparation for making your mini garden terrarium.
- Activated charcoal – This is used in the mini garden to assist with preventing the growth of fungi in your terrarium that can lead to plant diseases and death.
- Potting soil – You may purchase potting soil from the local garden supply store.
- Moss – This is an optional addition. You can take this out if having moss doesn’t fit your vision for your terrarium.
- Pebbles – You may use colored pebbles as this is mainly used for decorative purposes.
- Other small décor – You can DIY your own fence to put in your terrarium, or DIY little garden gnomes to make a realistic-looking mini garden. It’s up to you what you want to add to your terrarium!
- Skewer with a cork – Stick the cork at the end of the skewer for a useful tool to put your moss in place.
- Paintbrush – This is used to dust off any soil on your pebbles for a cleaner look.
- Small mist Spray – Used to water your plants without disrupting your arrangement.
Step 1: Clean the Container
You have to make sure that your glass container is clean no matter what size and shape it is. Wash it with soap and water and let it air out completely or wipe it down dry.
It is important to use a completely dry container to avoid unnecessary humidity inside. Having a moist container before putting your plants in might mess up your arrangement and make it difficult for you.
Step 2: Create the Base Layer
The first thing you must put in your mini garden terrarium is the layer where the water can drain from. It is important to have proper drainage in any plant setting so that the roots of the plants won’t drown from being water-logged and end up rotting.
Large pebbles are great for drainage in mini garden terrariums. Use these as the first layer in your terrarium.
Step 3: Time for Some Charcoal!
After you’ve put your large pebbles as the first layer, it is time to put on activated charcoal on top. The activated charcoal must be included in the bottom layer of your soil for maximum toxin removal.
Activated charcoal absorbs the chemicals that are present in the soil, air, and water inside your terrarium. If you don’t have a way to get rid of or release these chemicals, your plants might not survive in your mini garden terrarium.
It is not required to use activated charcoal in terrariums. You can use regular charcoal, but it is recommended to use activated because it is more porous and is, therefore, more absorbent.
The more absorbent it is, the more effective it is in getting rid of chemicals in your little garden. It is important to note, however, that when you are using a closed container terrarium, it is a must that you use activated charcoal.
Step 4: Let’s Get Mossy!
Now it’s time to put your moss on top of your charcoal. Break and tear up your moss into smaller pieces to make it more manageable and easier to spread out.
This is where your skewer with cork comes in handy. Use it to push and pat down the moss in place and arrange it properly.
RELATED: 15 DIY Vertical Gardening Projects For Small Space Gardening
Step 5: We’ve Got Potting Soil
Pull out your potting soil at this time. Place your soil directly above your moss layer and fill your container up to half-full with it.
You don’t have to pack it tight into your container when you put your soil in. You can just literally use a small shovel to put it in and fill your container halfway or until your moss is completely covered and you can’t see any of it peeking out.
Step 6: Poke Holes in Your Soil
Yup, it’s time to poke some holes in your soil! Use any of your available tools to create small holes where you can put your small plants in.
You can use your skewer with cork from earlier, or you can even use your fingers if you can fit your hand in the opening of your glass container. Whatever method you use, it’s important to be able to poke holes so that the roots of your plants have somewhere to slot in.
Step 7: Place Small Plants In
Untangle and dust off the roots of your small plants and slot them in the small holes that you’ve just created. Place your plants according to the design you had in mind.
You can play around with the different texture, colors, and height of your chosen plants and arrange them accordingly. Once you’ve placed them in their proper placements, use your skewer with cork tool to pat down the soil around your small plants to secure their spots and not have them dislodged.
Make sure to pat the soil down gently and not too aggressively! You don’t want the soil to be too tight so much that your plants’ roots won’t be able to breathe anymore.
Step 8: Top off Your Soil
Time to top off the soil with some pebbles! You can use small or large pebbles for this one, or why not go creative and use both? Go ahead and use colored ones too, if you like!
Step 9: Spray, Spray, Spray!
You’re pretty much done! Mist your plants a bit to make sure they stay hydrated and happy in their new home. Use your small spray mist and mist carefully and sparingly inside the terrarium.
You may also clean up some pebbles that have dirt or soil on them by brushing them off with the paintbrush.
Step 10: Final Touches
This is the part where you can put in whatever additional decorations you want to make your mini garden terrarium uniquely you! You can let your kids put small toys that they’re not playing with anymore and give them a new home in your newly built terrarium!
And there you have it! Your own mini garden terrarium. We hope you enjoy the process with your little one and we hope that they learn a thing or two about plant ecosystems!
Watch the full tutorial on how to make a mini garden terrarium from The Home Depot:
Terrariums are low maintenance and act as great accent pieces. On top of that, you can make these with your kids! Building a mini garden terrarium is a great way to educate them about plants and how their ecosystem works while having fun in quarantine!
Do you have questions or suggestions about making your own mini garden terrarium? Share your thoughts with us in the comments section below!
UP NEXT:
- This DIY Succulent Planter Will Make Walls And Gardens Look Beautiful
- 20+ Incredible DIY Garden Projects To Choose From
- Fabricate A DIY Murphy Bed To Make Your Small Bedroom Look Big
Calling all crafting DIYhards, DIY Projects needs YOU! Click here if you want to contribute for us.
Don’t forget to stay connected with us on Facebook, Twitter, and Instagram!
The post Build A Mini Garden Terrarium With Your Kids appeared first on DIY Projects Craft Ideas & How To’s for Home Decor with Videos.
Related posts:
 50 Magical Terrarium ideas to install in Your Home
 25 Beautiful and Safe garden privacy ideas
 Rain Chains: A Fun & Effective Alternative To Gutters
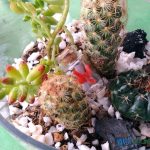 How To Make a Cool, Tiny DIY Succulent Terrarium (7 STEPS)
 40 Majestic Fairy Garden Installations
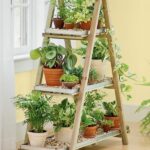
 40 Modern Indoor Garden Ideas From Future
 10 Super Creative Vertical Garden Ideas
 400+ Best DIY Christmas Projects You Should Make This Year
 63 Things To Never Throw Away For DIY Junkies [2nd Edition]
 40 Brilliant Indoor Water Garden Ideas
 15 Art Therapy Activities Kids Can Do By Themselves
 21 Fall Door Decorations | DIY Wreaths, Door Hangers, And More
 Backyard Projects To Enjoy Time Outdoors This Summer
 13 DIY Homemade Weed Killers To Improve Your Gardening
 Is Mineral Water Worth the Extra Cost? Find out Here
 Gas Versus Charcoal: Summer’s Most Important Decision