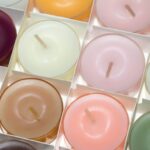
Lavender is a favorite of many homeowners because of its calming and soothing floral scent. This quick 30-minute candle making guide will teach you how you can infuse your home with this scent using your own DIY lavender candles.
RELATED: DIY Wooden Candle Holder | Easy DIY Projects
Homemade Candles | How to Make Your Very Own DIY Lavender Candles From Scratch
What You’ll Need:
- Lavender flowers
- A mason jar
- A candlewick
- Glue gun and glue stick
- Fragrance oil
- Dye (with the color of your choice)
- Dried wax
- Parchment paper or newspaper
Step 1: Dry Some Lavender Flowers
Start by getting some lavender flowers and letting them dry.
Some supermarkets already offer lavender flowers that have been dried. However, if you want a more natural approach, you can dry them yourself.
Step 2: Melt Your Wax
In melting candle wax, you’ll use the double boiler method. To do this, just grab a small pot for your candle wax and place it inside a larger pan filled with water.
Place the pan on the stove and bring the water to a boil by placing the flame either on medium or medium-high heat. As the water boils, you’ll also start seeing your candle wax melt.
Let it reach a temperature of about 180 degrees before you lower the flame.
Step 3: Give It Some Color
Depending on your tastes, you can choose to skip this step. Some people prefer to leave their candles with their white color. However, if you’re one of those who want to give it that lilac hue to represent the lavender scent it’ll have, then keep reading.
With a plum-colored dye, add a few drops to your melted candle wax. Add as much as you want to intensify the colors. Be careful, though: if you add too much, there is no way to reverse the process.
Keep in mind that the color you see in the mixture will most likely lighten once the candle wax dries up. To check, you might want to get a few drops of the wax and let it dry on a white surface. You should be able to see if you now have the color you want your lavender candles to have.
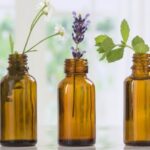
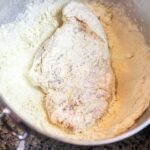
Step 4: Add Your Fragrance Oil
Simultaneously, you should also add in the fragrance oil or essential oil of your choice. Start by removing the melted wax from the heat and letting it cool down to about 125 degrees.
For every 2-3 lbs. of candle wax, you should add about 0.5 ounces of your lavender essential oil. If you want it to have a stronger scent, then just be a bit more generous with your oil.
RELATED: DIY Soy Candles | 15 Addictive Scents You Will Love
Step 5: Mix, Mix, Mix
With the lavender oil and the dye now incorporated into your candle wax, mix everything thoroughly.
You want the essential oils and the dye to really combine with the candle wax. This should give it that strong but soothing scent once it dries into your actual scented candle.
Step 6: Glue the Wick in Place
Now, leave your melted wax alone for a few minutes and grab the mason jar or whatever container you’ll be using for your candle.
Get the candle wick and use the glue gun to apply hot glue to the end of the wick. Afterward, stick it to the bottom of your chosen container.
Make sure to keep it in the center of the container as well. The wick should extend about half an inch above where the top of your candle wax will be.
Before moving on to the next step, place a stick at the top of the container and tie the wick to it. This should keep it straight and centered while you move on to pour the melted candle wax in the container.
In lieu of a stick, you can also use a clothespin.
Step 7: Add the Dried Lavender Flowers In
Get your dried lavender flowers and add them generously to the bottom of your container.
Step 8: Pour the Melted Wax In
As a general rule to any DIY candles project, make sure to have some parchment paper, old newspapers, or even a rug ready before you start pouring your melted wax. Placing it under the container before you pour in the melted wax should save you the trouble of scraping dried wax from surfaces later on.
Carefully pour the melted wax into your container. Make sure to avoid spilling it and to keep the wick centered throughout the process.
As you pour, you can also choose to add more dried lavender flowers. The ones you put in earlier will most likely float to the top of your melted wax. If you want it to be distributed as the candle melts, you can pour in levels and let the melted wax dry before adding some more in.
Once you’re done, try to wipe any spills off the side of the container before it dries. Leave the melted wax in a place where it won’t be moved or disturbed before allowing it to settle and dry for about 24 hours.
After the wax dries, trim the wick as necessary.
Step 9: Decorate and Enjoy
That’s it! You now have your lavender candles that are ready to be used at home or even as gifts. If you want, you can decorate the container as well to give it a more sophisticated look.
Wrapping some twine at the top of your container and tying in a few dried lavender stems should give it a better aesthetic. Not only is it good for giving your room a relaxing scent, but it’ll also work as a great decorative item.
Now that you’re done making your own lavender candles, try these 15 DIY candle hacks by Blossom:
Using scented candles is a perfect way to infuse your home with some intoxicatingly relaxing scents. DIY lavender candles are not just great for improving the ambiance in any room. They’re also decorative items that make for beautiful gifts perfect for any occasion.
Did you find this DIY folding workbench helpful and easy to build? Share your thoughts with us in the comments section below!
UP NEXT:
- How To Make DIY Paper Flower Candle Holders
- Create A Prism Candle Light | DIY Mason Jar Crafts
- How To Make A Marbled Wine Glass Using Nail Polish
Calling all crafting DIYhards, DIY Projects needs YOU! Click here if you want to contribute for us.
Don’t forget to stay connected with us on Facebook, Twitter, and Instagram!
The post Soothing DIY Lavender Candles To Melt Your Stress Away appeared first on DIY Projects Craft Ideas & How To’s for Home Decor with Videos.
Related posts:
 Coconut Oil for the Hair: Benefits and Uses, Do and Don’ts
 Candle Making Kit Checklist To Get You Started
 How To Reuse Candle Wax To Make New Candles And Save Money
 Essential Oils: 11 Main Benefits and 101 Uses
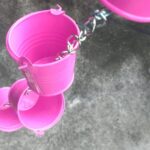 Rain Chains: A Fun & Effective Alternative To Gutters
 A Local’s Tips on Where to Eat, Drink, and Stay in Paris
 Peppermint Bark Recipe: A Festive Holiday Candy
 Gluten-Free Eggplant Flatbread Pizza Recipe
 Vegan Coconut Cocoa Cheesecake Recipe
 Lamb Burgers Recipe
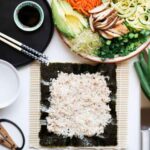 Vegan Sushi Recipe: How to Make Healthy Vegetable Rolls
 Fish Taco Recipe
 Paleo Muffins with Almond Meal and Cacao Nibs
 Easy Homemade Chicken Marsala Recipe
 Stuffed Mushrooms Recipe
 Coconut Milk Pudding Recipe